Retaining Wall

Retaining walls are load bearing landscape structures. A failure can, depending on the wall’s location, affect the home, its attached hardscape, and the property’s overall topography. Drainage to prevent a buildup of hydrostatic pressure behind the wall is critical in preventing overall movement. However, these systems are not always visible or apparent. Retaining walls are visually inspected for deterioration, leaning, or other signs of failure. Masonry structures should have intact mortar joints, and masonry units should be free of spalling or cracking. Landscape timbers should be solid and free of rot. Concrete walls should not show cracking.

Inspect for any signs of movement or leaning. There should not be any forward tilting overall, or bulging. The wall should have a straight line from the top to the bottom. “Dry-Lock” blocks must always be stepped back evenly from the bottom to the top.

There are minor cracks in the retaining wall. This can allow moisture penetration and cause further damage. Repair and seal the cracks.

There is minor movement in the retaining wall. The cause for this should be determined, and repairs made to prevent further movement. Hire a contractor to evaluate the movement and provide repairs as needed.

The retaining wall is leaning. The cause for this should be determined, and repairs made to prevent further movement. Hire a contractor to evaluate the movement and provide repairs as needed.

The retaining wall is deteriorated. Replacement may be needed to ensure continued function. Replace the retaining wall.

The retaining wall is collapsing. The cause for this should be determined, and safety measures made to prevent further movement. Replace the retaining wall.

Inspect for evidence of a drainage system behind the wall, or that one is not present or has failed. Landscape timbers and Dry-Lock blocks allow drainage through the natural openings in a wall’s face. Concrete or masonry walls should have visible drainage. This may be a drain tile exiting from the downhill side, which may terminate at a distance. Weep holes are common, especially in older construction. They should be present every several feet and not be obviously clogged. Significant efflorescence and peeling paint are warning signs that water is seeping through the body of the wall.


The retaining wall has no weep holes. Weep holes are designed to alleviate water pressure from behind the wall that might otherwise cause the wall to shift and fail. Add weep holes to the retaining wall.

The retaining wall’s weep holes are clogged. Weep holes are designed to alleviate water pressure from behind the wall that might otherwise cause the wall to shift and fail. Clear the weep holes.

The retaining wall has inadequate drainage. Pressure can build up behind the retaining wall and cause movement or failure. Add drain holes to the retaining wall, or install a drainage system behind it.

Retaining walls that are 30” or more above grade should have a guardrail installed at the top. Note that older codes called for a guardrail when the wall is 36” above grade. Inspect guardrails for deterioration. They should be secure, stable, and provide good support without movement. Rails should be 34” – 38” high above the grade surface. The openings between balusters should be no more than 4”. All balusters should be present and intact. Guardrails with climbable horizontal balusters should be reported.


The guardrail is missing at the retaining wall. This is a safety hazard. Install a guardrail.

The guardrail is loose. This is a safety hazard. Repair or replace the guardrail.

The guardrail is damaged or deteriorated. This is a safety hazard. Repair or replace the guardrail.

The balusters are horizontal at the guardrail. This is a safety hazard. Horizontal balusters can be used by children to climb onto the rail. Repair or replace the balusters.

The guardrail is too low. This is a safety hazard. Guardrails should be at least 36″ high. Raise the height of the guardrail.

Retaining Wall Limitation and Information Statements

Visual inspection only, below grade not inspected: Retaining walls are visually inspected for deterioration, leaning or other signs of failure. Portions of the structural components are below grade and therefore cannot be inspected. Determination of the adequacy of a retaining wall is outside the scope of a home inspection absent any signs of failure.

Near/at end useful life, budget for replacement: The retaining wall is near or at the end of its useful life. We recommend establishing a budget to replace the retaining wall.

Past end useful life, budget for replacement: The retaining wall is past the end of its useful life. We recommend establishing a budget to replace the retaining wall.

Garage Vehicle Door

Garage vehicle doors are the heaviest moving objects in a home. As such they have significant potential for safety hazards. They are also the largest exterior entryway, and therefore must be appropriately weather-tight.

Inspect the vehicle door(s) for their overall condition, noting damage, deterioration, poor fit in the opening, or any misalignments. Inspect all safety, mounting and guide hardware to ensure that the door(s) are secure, stable, and move freely as designed. Inspect latching and locking mechanisms for proper operation and condition. Inspect for the presence and condition of weather stripping to ensure that the elements do not enter the garage interior.

Inspect vehicle doors that open upwards for balance; they should maintain whatever position they are set to and not close on their own. They should move freely in the tracks or guides without binding. Inspect overhead doors for intact counterbalance mechanisms, e.g. torsion springs, safety cables, and extension springs. Doors that move laterally should be inspected to ensure they open fully and do not drag or bind.

The vehicle door is damaged or deteriorated. This affects safety and proper function. Hire a contractor to repair or replace the door as needed.

The vehicle door binds in the tracks during operation. This affects proper function and can cause further damage. Hire a contractor to identify the cause and provide repairs as needed.

The vehicle door’s hardware is loose. This affects proper function and is a safety hazard. Repair or replace the hardware as needed.

The vehicle door’s hinges are loose. This affects proper function and is a safety hazard. Repair or replace the hinges as needed.

The vehicle door’s locking mechanism is damaged and will not unlock. Repair or replace the lock as needed.

The vehicle door’s lock and handle are missing. This affects proper function. Replace the lock and handle.

The vehicle door has a broken window. This is a safety and security issue. Replace the window glass.

The vehicle door is inoperative. Repair or replace the door.

The vehicle door’s safety cables are damaged or missing. This is hazardous if the springs fail. Hire a contractor to replace the safety cables.

The vehicle door’s torsion spring is damaged. This is a safety hazard. Hire a contractor to replace the spring.

The vehicle door’s extension springs are damaged. This is a safety hazard. Hire a contractor to replace the springs.

.

The vehicle door’s weather stripping is missing. This will allow air, water, small animals, and weather to travel freely into the garage. Replace the weather stripping.

The vehicle door’s weather stripping is damaged. This will allow air, water, small animals, and weather to travel freely into the garage. Replace the weather stripping.

Garage Vehicle Door Limitation and Information Statements

Locked, not operated/tested: The door is locked and, therefore, is not operated or tested.

Blocked, not operated/tested: The door is blocked and, therefore, is not operated or tested.

Near/at end useful life, budget for replacement: The garage vehicle door is near or at the end of its useful life. We recommend establishing a budget to replace the door.

Past end useful life, budget for replacement: The garage vehicle door is past the end of its useful life. We recommend establishing a budget to replace the door.

Garage Vehicle Door Opener

The inspection procedures for Garage Vehicle Door Openers addresses the applicable safety standards that designate a Primary Entrapment Protection device as one that relies on downward travel resistance when the door is closing. Optical sensors (so-called “electric eyes”) are Secondary Entrapment Protection devices. These procedures are based on the Consumer Product Safety Commission (CPSC) mandatory safety rule 16 CFR part 1211. The Consumer Product Safety Improvement Act of 1990 (Improvement Act) mandated that automatic residential garage door operators (GDOs) manufactured on or after January 1, 1991 conform to the entrapment protection requirements of the 1988 version of UL 325. On June 19, 1991, the Commission issued the garage door operator standard (16 CFR Part 1211).

Assess the garage carefully to determine if there are any obstacles or personal belongings that will prevent or interfere with safe door operation. This must include vehicles or personal property that are in the closure path of an open vehicle door. Inspect the door tracks. They must be free of damage, or any obstacles or locking devices that will impede the door’s movement.

Perform an operational test of the opener. The company-supplied GDO test block, or a suitable substitute, must be used. Your outstretched arms are not acceptable. A flashlight or roll of paper towels on the ground is not acceptable. The door should reverse within 2 sec. of closing on the test block and fully re-open . Once you have confirmed that the primary reverse mechanism works, re-test the door by breaking the optical beam. The door should reverse immediately and open fully.


The automatic garage door opener is an older type that appears to lack an auto-reverse safety feature. This can be hazardous for vehicles or people beneath the door when it is closing. Replace the garage door opener.

The automatic opener at the vehicle door does not have an optical sensor. While it may not have been required when the opener was installed, this is a safety hazard. Install optical sensors.

The optical sensors are improperly installed at the garage vehicle door’s automatic opener. The recommended height for safe operation is 4″ – 6″ from the floor. Reinstall the optical sensors.

The automatic opener does not reverse properly at the garage vehicle door. It should reverse within 2 seconds of closing on a 1 – 1.5″ object placed on the floor. This is a safety hazard. Repair or replace the garage door opener.

The garage vehicle door opener’s emergency disconnect rope is missing or too high. This is a safety concern. Install or lower a disconnect rope.

The chain on the automatic garage door opener has too much slack. This allows shocks to the mechanism during operation and can cause the chain to break or come off. Adjust the chain.

The garage door automatic opener is not securely mounted. This is a safety concern. Securely mount the garage door opener.

The wall button for the garage door opener is damaged or missing. This can affect proper operation. Repair or replace the wall button.

The wall button/keyless entry pad for the garage door opener is mounted too low to the floor. These should not be lower than 5′ above floor level so that children cannot activate the door without supervision. Relocate the wall button.

1. INTRODUCTION

1.1 This standard covers the procedures for inspecting garage door operators (GDO).

1.2 These Field Procedures address the applicable safety standards that designate a Primary Entrapment Protection device as one that relies on downward travel resistance when the door is closing. Optical sensors (so-called “electric eyes”) are Secondary Entrapment Protection devices.

1.3 These Field Procedures are based on the Consumer Product Safety Commission (CPSC) mandatory safety rule 16 CFR part 1211. The Consumer Product Safety Improvement Act of 1990 (Improvement Act) mandated that automatic residential garage door operators (GDOs) manufactured on or after January 1, 1991 conform to the entrapment protection requirements of the 1988 version of UL 325. On June 19, 1991, the Commission issued the garage door operator standard (16 CFR Part 1211).

1.4 FROM 16 CFR PART 12II:
A. § 1211.7 Inherent primary entrapment protection requirements.
(a) General requirements. A vertically moving residential garage door operator system shall be supplied with inherent primary entrapment protection that complies with the requirements as specified in paragraph (b) of this section.
(b) Inherent primary entrapment protection, vertically moving doors.
For a vertically moving residential garage door operator system, ……… the operator of a downward moving residential garage door shall initiate reversal of the door within 2 seconds of contact with the obstruction as specified in subparagraph (b)(3) of this section.

(3)(i) A solid object is to be placed on the floor of the test installation ……. and located in line with the driving point of the operator. When tested on the floor, the object shall be 1 inch (25.4 mm) high.

2. PRIOR TO THE INSPECTION: THE NIGHT BEFORE

2.1 Inspectors shall:

A. Ensure that they have received the company-issued GDO test block, and are carrying it to their inspections.

B. Ensure that they are fully familiar with applicable state and local requirements. Most GDO manufacturers and jurisdictions allow testing of the Primary Entrapment Protection device by using a 2×4 board laid on the wide side (1 ½”- 3.8cm). NOT ALL DO. Additionally, some jurisdictions have adopted newer versions of The Standards based on recent revisions to UL 325. These recommendations to the CPSC include a requirement that the door control button must be held down continuously to complete closure.

3. PRIOR TO THE INSPECTION: ON SITE

3.1 It is important to inspect in a methodical and regular manner. All accessible vehicle doors equipped with a GDO must be inspected following these procedures.

A. Assess the garage carefully to determine if there are any obstacles or personal belongings that will prevent or interfere with safe door operation. This must include vehicles or personal property that are in the closure path of an open vehicle door.

B. Be aware of any children present. Notify the appropriate adults that they must supervise children during your testing to prevent a personal injury, or allow a child to leave the property when a door(s) is open.

C. Ensure that opening a vehicle door will not allow a pet to escape. Request the assistance of the Homeowner or Realtor® as needed.

4. THE INSPECTION PROCESS: VISUAL ASSESSMENT

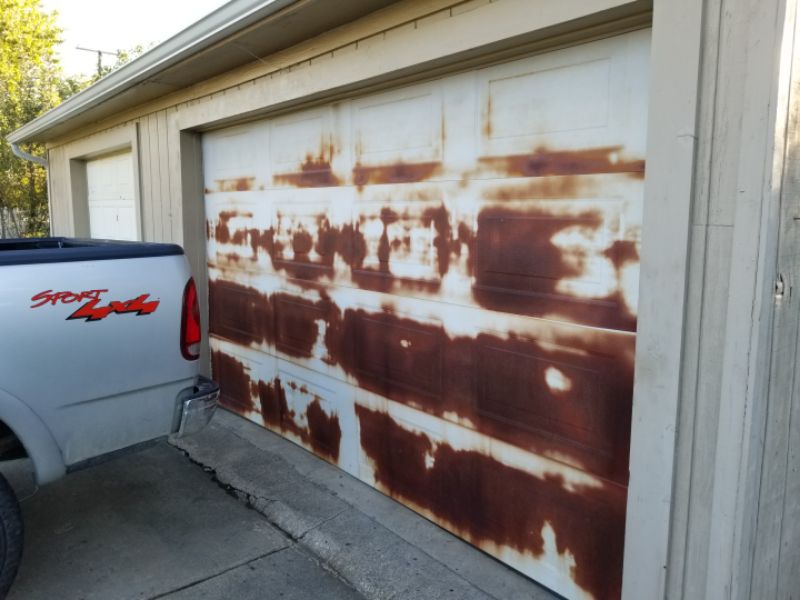
4.1 Start your inspection with a visual assessment. Identify which doors have a GDO. The steps that follow should be applied with each vehicle door in turn. Operating a GDO without a careful examination first can result in property damage and/or personal injury. Report all defects, taking photos whenever possible.

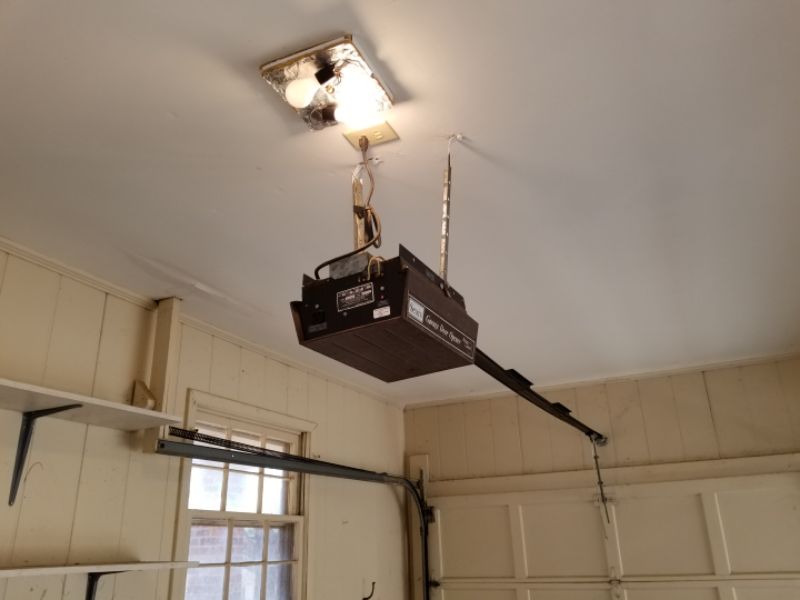
A. Observe the GDO mechanism to determine if it is plugged in. If it is not, or if the power is not on at the property, report the GDO as “Not Inspected” due to no power. Report any electrical installation defects in the “Electrical” section.

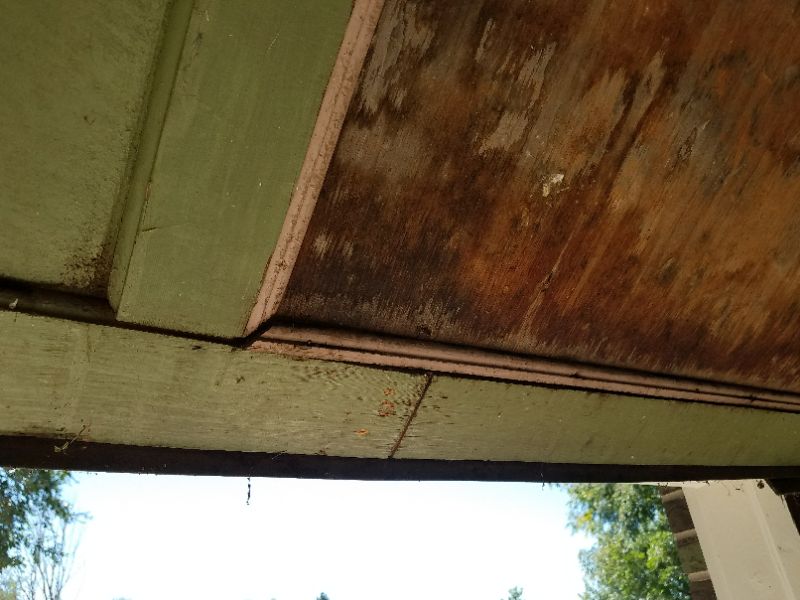
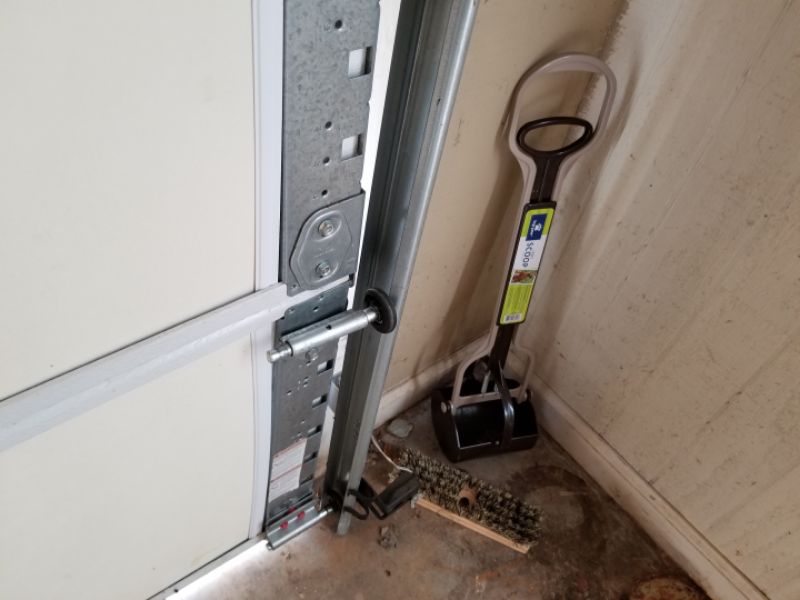
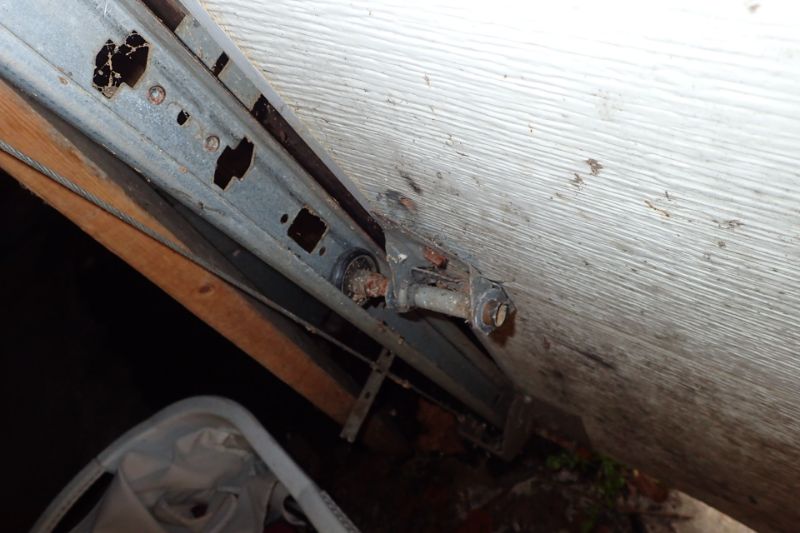
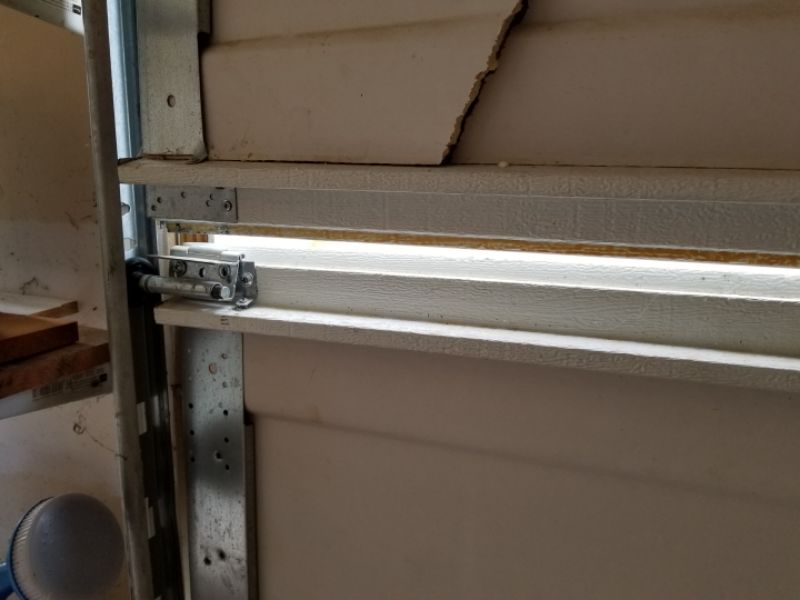
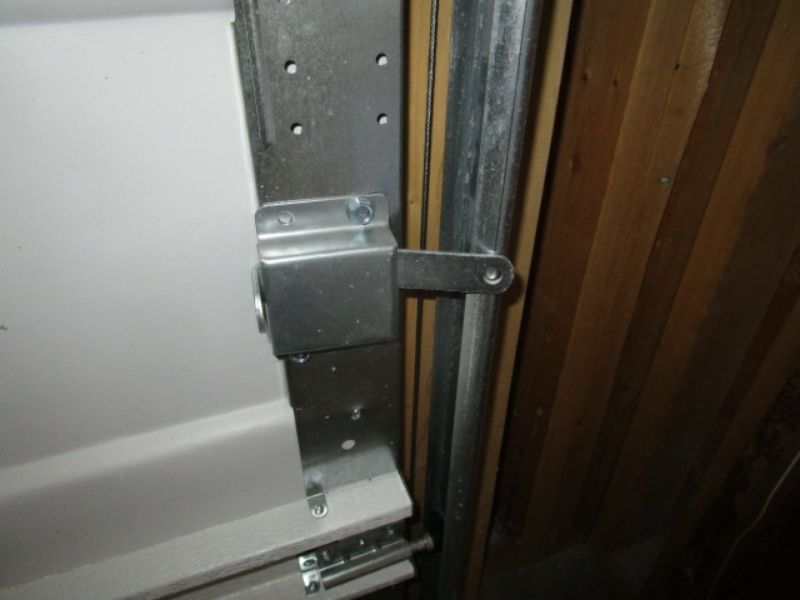
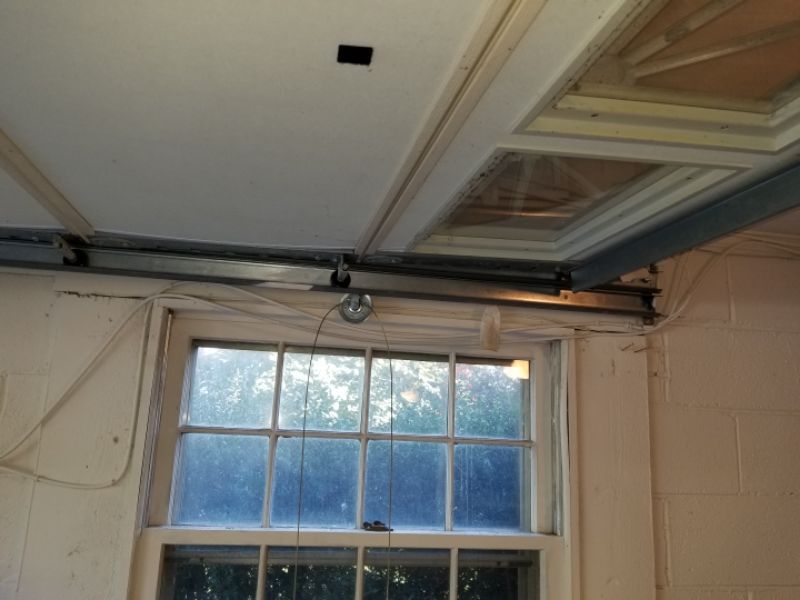
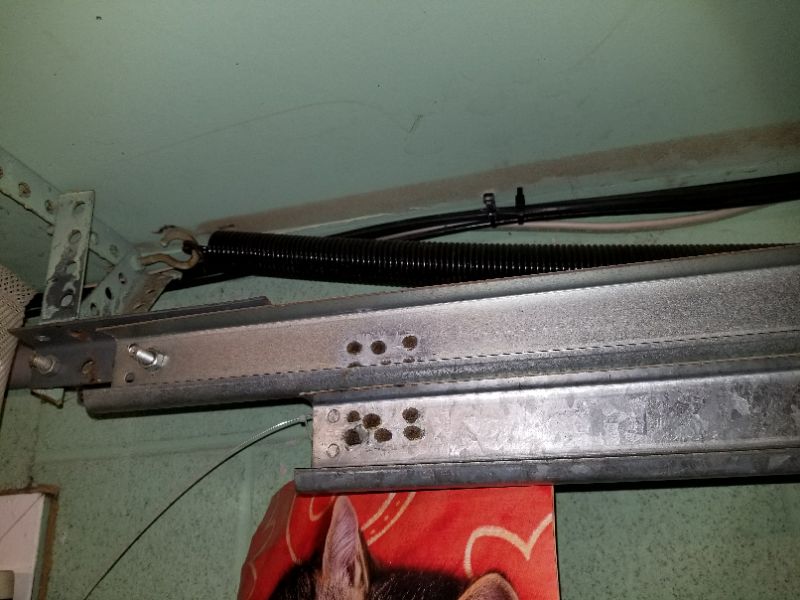
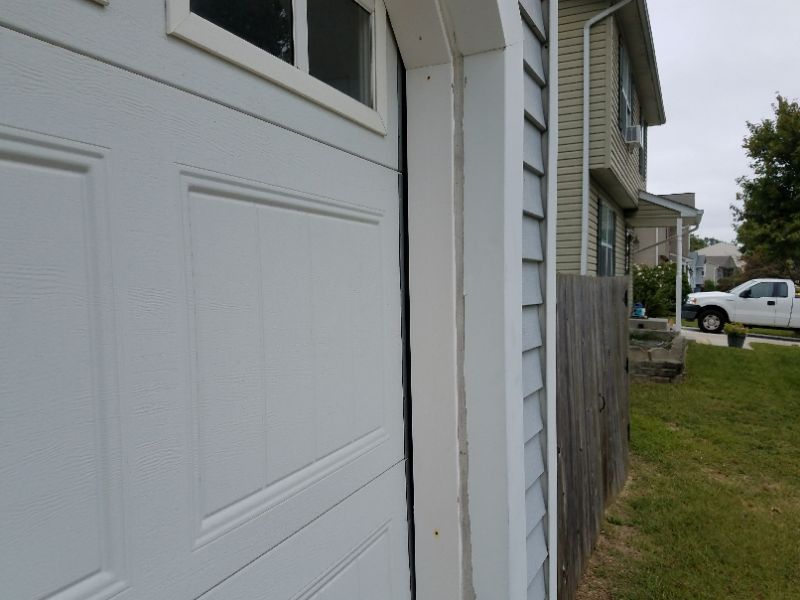
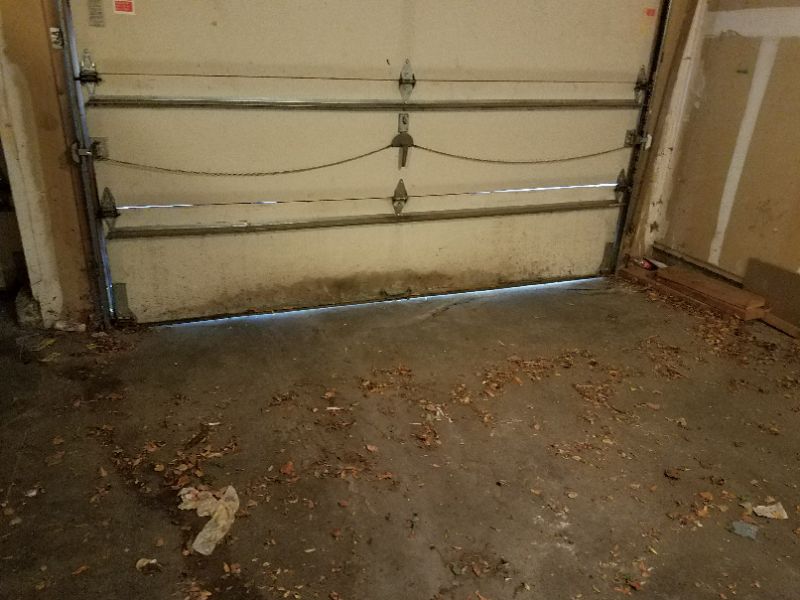
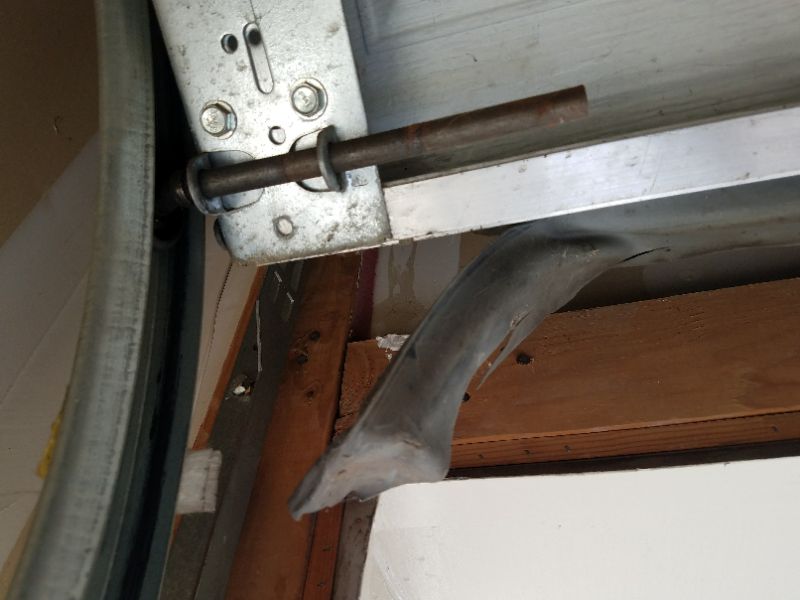
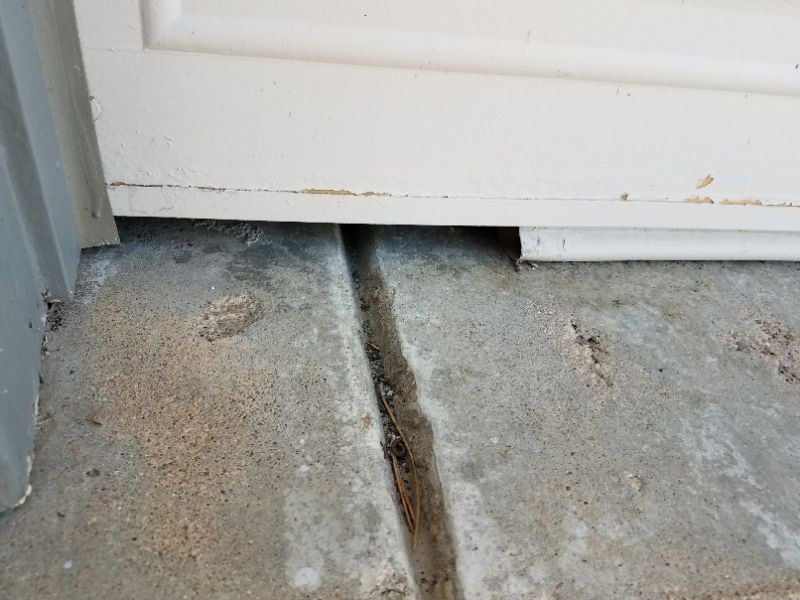
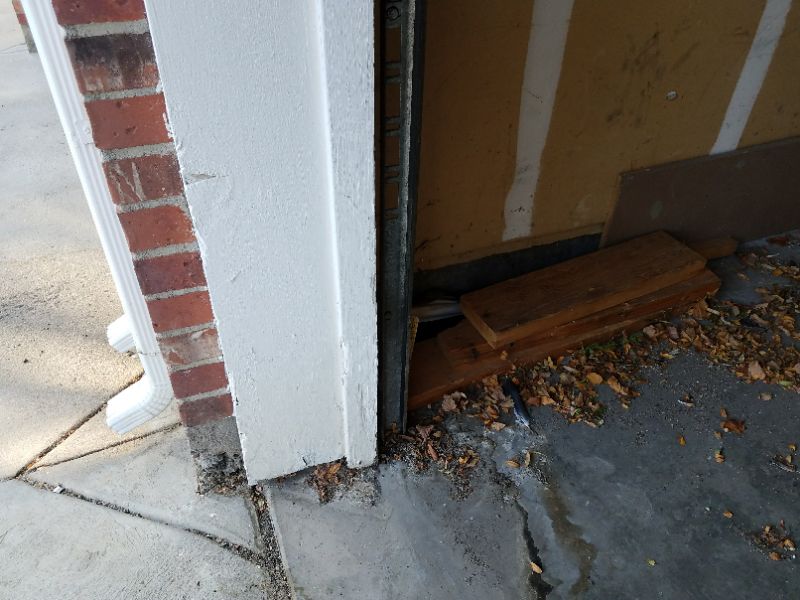
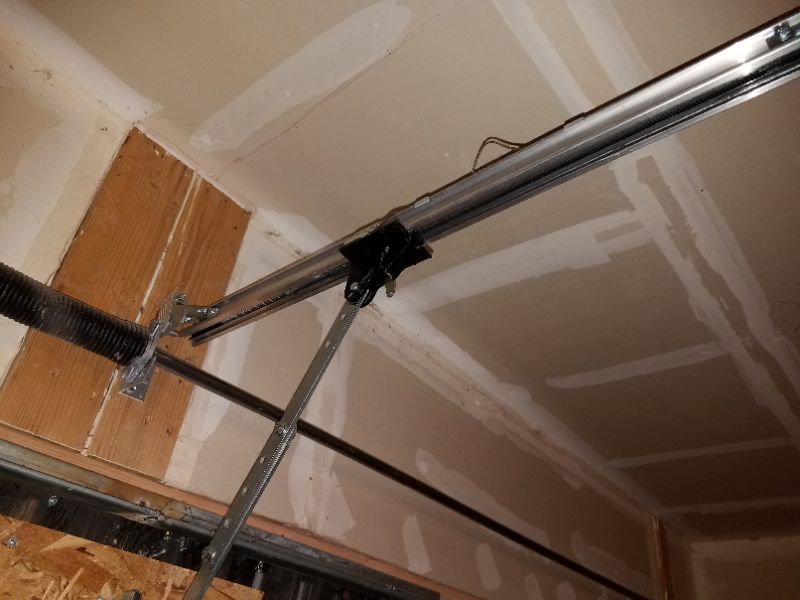
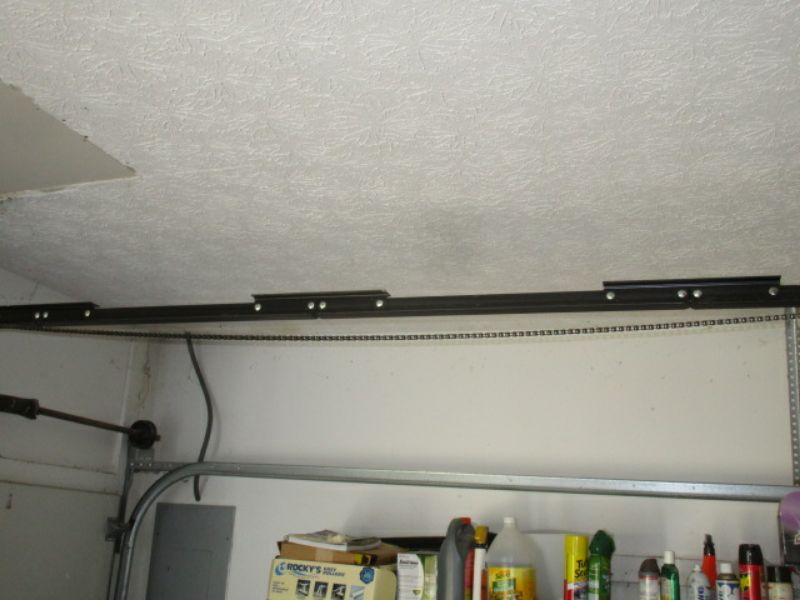
B. Inspect the door tracks. They must be free of damage, or any obstacles or locking devices that will impede the door’s movement. They should be straight front-to-rear, and securely installed with all fasteners present. The rail between the motor and door, if present, should also be straight front to rear and attached at the door’s left-to-right center point.

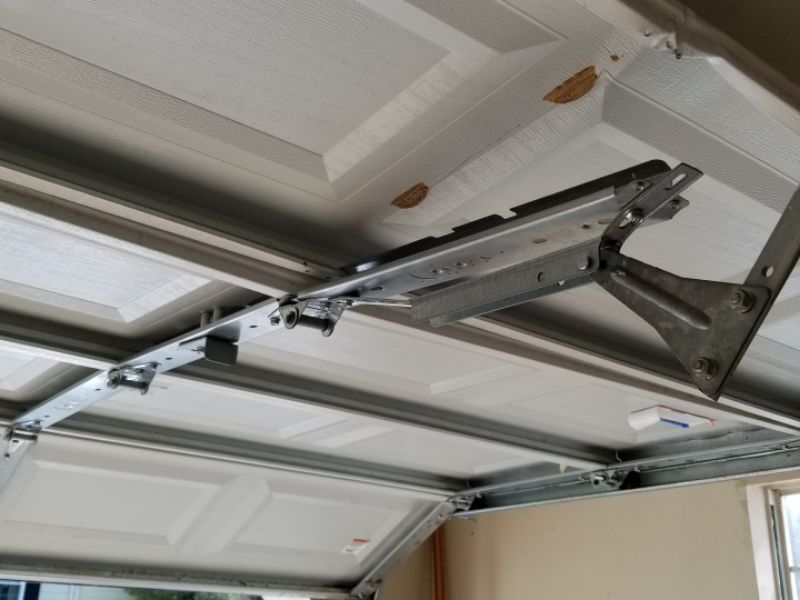
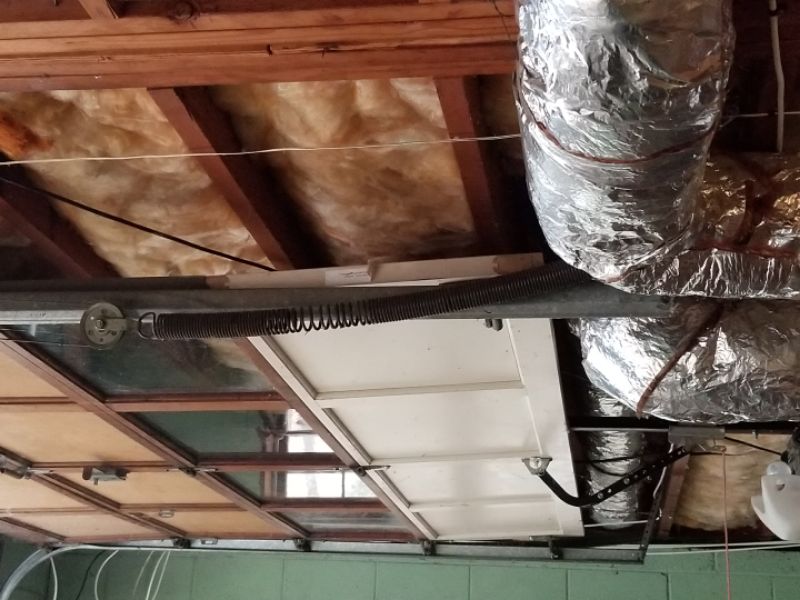
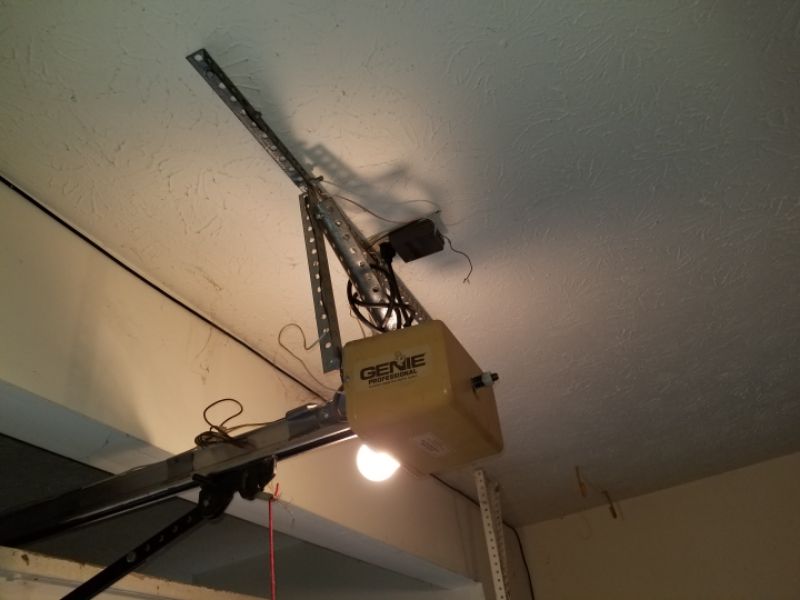
C. Inspect the motor unit. Ceiling-installed units should be mounted securely to prevent wobbling. Two or more angled brackets are normally needed. A minimum distance of 7’ from the floor is usually required. It should be at approximately the same height as the drive track or where the door will be when fully open. The drive chain, if present, should be tight enough to prevent it from hanging at or below the bottom of the rail between the motor and the door. All control wires should be clear of moving parts.

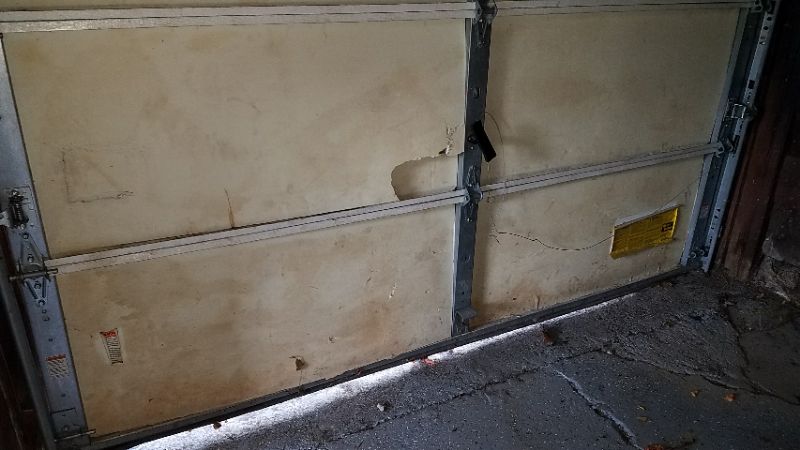
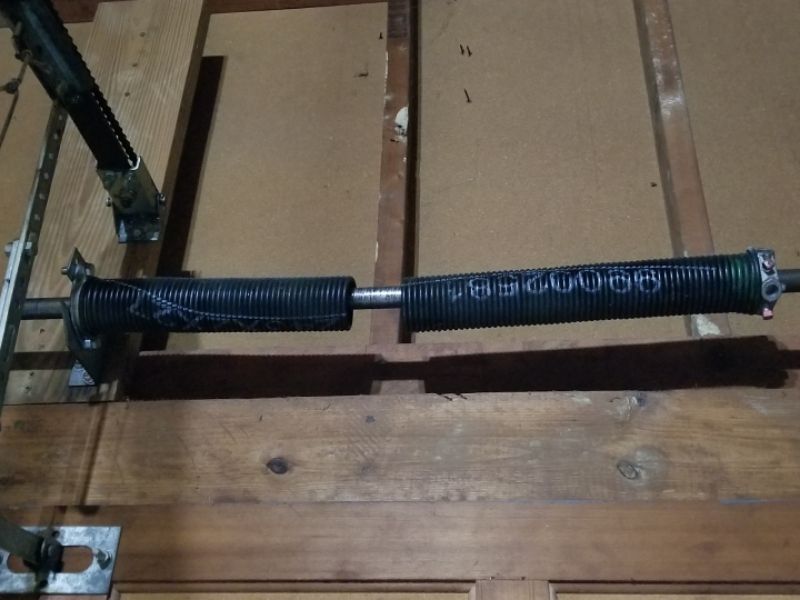
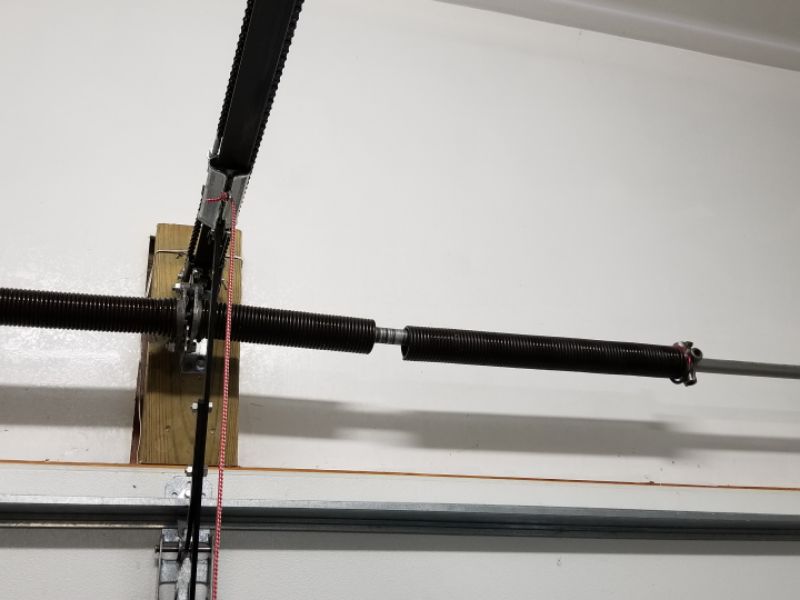
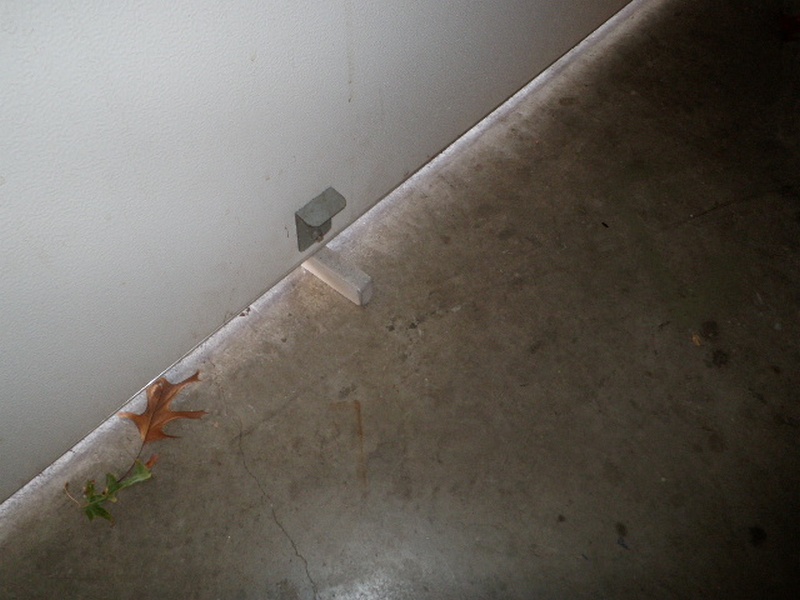
D. Inspect the door, springs, rollers, and mounting points for damage, looseness and/or missing fasteners. The drive rail, if present, should be connected to solid framing, normally using a mounting block.

E. The Emergency Release Handle should be installed no higher than 6’ from the floor.

F. The door control switch or push button should be no lower than 5’ from the floor to prevent children from operating it.

5. THE INSPECTION PROCESS: PRIMARY ENTRAPMENT PROTECTION

5.1 Perform an operational inspection after completing the procedures in Sections 3 and 4. Repeat the steps outlined with each door present. Report all defects, taking photos.

5.2 The company-supplied GDO test block, or a suitable substitute, must be used. Your outstretched arms are not acceptable. A flashlight or roll of paper towels on the ground is not acceptable. Any test object must be a solid material of the proper dimensions as noted in Sections 1.4.A or 2.1.B.

A. Open the door by pressing the control switch or push button briefly and then releasing it. The door should open completely without holding down the button. Do not move away from the control.

B. Be alert for any unusual noises or stalled movement that may indicate an obstacle, damaged track, or faulty operator. If any is noted, stop the door’s movement immediately using the control button. Inspect the door installation to determine if any problems were missed during the visual inspection. If none is evident, close the door using the control switch. If the door will not operate you may need to use the Emergency Release Handle. Report any defects. Inform your client and the Realtor® of any problems that prevent you from closing the door and securing the property.

C. When the door is fully open, place the GDO test block on the ground in line with the drive point of the opener.

D. Close the door, pressing the control switch briefly and then releasing it. The door should close completely without holding down the button. [See Section 2.1.B]

E. The door should reverse and fully re-open within 2 sec. of closing on the test block. If it does not, take a picture of the door closed on the block. Take a picture of any Manufacturer label present that outlines testing with a block. Report the defect and insert the photos, noting which door is defective.

6. THE INSPECTION PROCESS: SECONDARY ENTRAPMENT PROTECTION

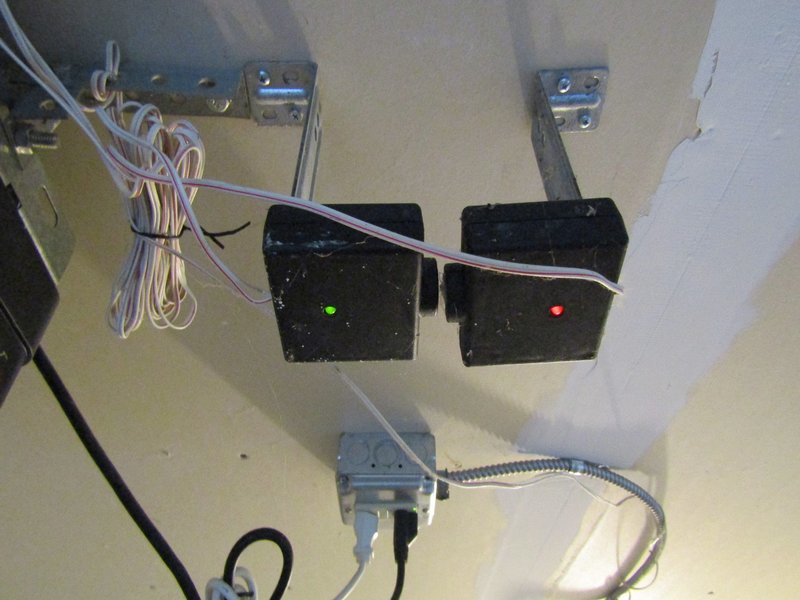
6.1 Visually inspect for the presence of Secondary Entrapment Protection devices. These are optical sensors, or so-called “electric eyes”.

6.2 Report as a defect if none are present. In an RPA, report as Inoperative with additional information that none are installed.

A. The optical sensors should be installed at 4” to 6” above the floor. Report as defective if otherwise.

B. Once you have confirmed free closure of the door by following the procedures in Section 5.2.A -E, press the operator button to close the door from an open position.

C. Move to the door opening and break the optical beam. The door should reverse immediately and open fully. Report as defective as needed.

7. WRAPPING UP

7.1 Ensure that all doors are left as you found them. If a defective condition has prevented properly securing the property be sure to discuss this with any Realtors® present. Reasonable efforts should be made to inform the Homeowner(s) as needed.

7.2 Remember that these Field Procedures describe the only approved standards for testing GDO Primary Entrapment Protection devices. On rare occasions, damage to the door or overall installation may occur when following these procedures. Any damage should be reported promptly to your Area Manager so it may be referred properly to HQ staff. Do not become involved in any arguments on-site. A polite explanation of why the testing method was used is sufficient.

Garage Vehicle Door Opener Limitation and Information Statements

Not connected to a power source, not operated/tested: The garage vehicle door opener is not connected to a power source and, therefore, cannot be operated.

Parts not visible, limited inspection: Parts of the garage door opener unit are not visible, which limits the inspection.

Near/at end useful life, budget for replacement: The garage door opener is near or at the end of its useful life. We recommend establishing a budget to replace the garage door opener.

Past end useful life, budget for replacement: The garage door opener is past the end of its useful life. We recommend establishing a budget to replace the garage door opener.

Carport

Inspect the carport for damage, deterioration, and stability. All supports should be in good condition and the structure should be securely anchored into the ground. The carport should not sway or move under lateral pressure. Inspect the overhead covering (roof) to ensure that it is secured to the structure, and is free of holes, damage, deterioration, and evidence of leaking.

There are damaged/deteriorated supports at the carport. This is a safety hazard. Repair or replace the supports.

The carport’s support posts are not secured, or are unstable. This is a safety hazard. Repair or replace the supports.

The carport roof is damaged/deteriorated. This will allow leaks, and can be a safety hazard. Repair or replace the roof.

The carport pad is undermined. This can allow damage and failure. Repair the support and address any water control issues as needed.

Carport Limitation and Information Statements

Near/at end useful life, budget for replacement: The carport is near or at the end of its useful life. We recommend establishing a budget to replace the carport.

Past end useful life, budget for replacement: The carport is past the end of its useful life. We recommend establishing a budget to replace the carport.